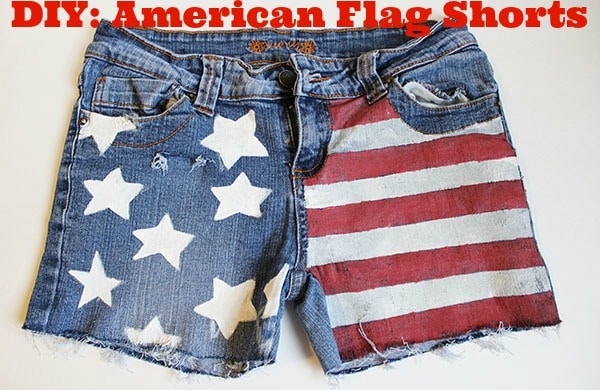
DIY American Flag Shorts
Being patriotic is always in fashion and wearing the symbol of the country you’re proud to call home is always a stylish choice. For those of us in the U.S.A, we have a holiday this week that celebrates our independence.
Today, I’m going to show you how to make your very own American Flag Shorts. Whether you need a last-minute 4th of July outfit or just want to rock an awesome pair of shorts, grab a pair of old jean cutoffs and let’s get started!
Table of Contents
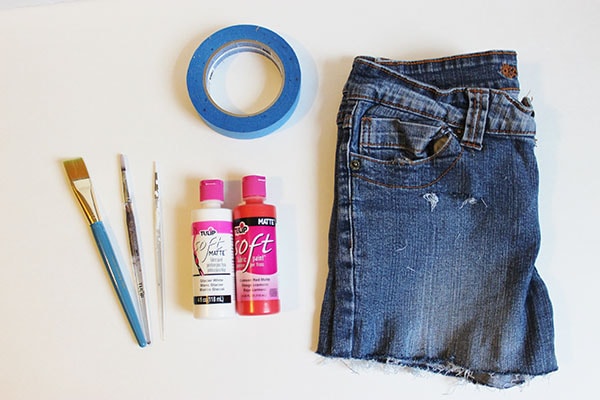
You Will Need:
- Denim Shorts
- Red & White Fabric Paint
- Painter’s Tape
- Paint Brushes
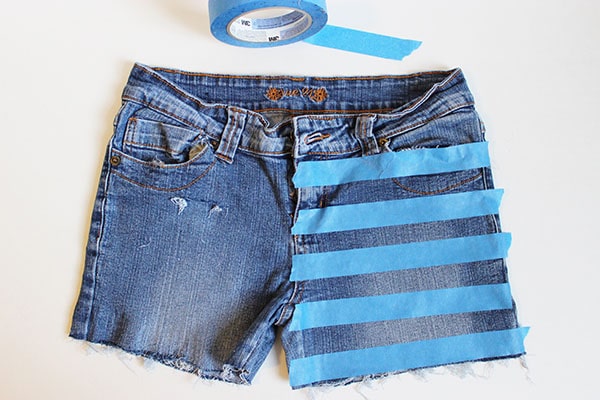
Step One.
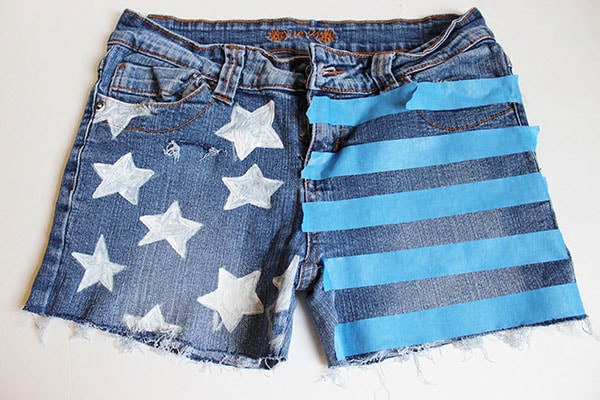
For the first step, you should decide which side of the shorts that you want your stripes to go on. I chose the left leg so that my shorts would mimic the flag, but you could get more abstract or creative with it if you wanted. I made my stripes about an inch apart, but you can make them smaller or larger depending on your preference. Use the painter’s tape to keep the lines straight.
Step Two.
For the second step, use a piece of chalk or a pencil to draw the stars on the other leg. I made my stars pretty medium-sized, but, of course, if you want more stars you can make them smaller.
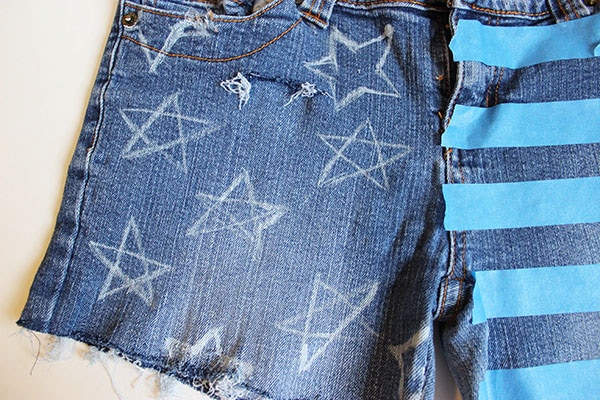
Next, use the white fabric paint to carefully fill in the stars. This may take a few coats to get the right amount of opaqueness. Remember to let each coat dry before putting on the next.
Step Three.
Now it’s time to paint on the stripes. Using the white paint, evenly paint where the tape is exposing the denim. Go slowly and take your time to avoid any mistakes.

Once you’re done with the white stripes, peel off the painter’s tape.

Step Four.
Finally, take the red paint and paint in all the spaces between the white paint. I found this was easiest to do with a flat brush to keep the lines nice and straight.