Advertisement With this braid technique, you have the possibility of making it bigger in three directions, and not just wider. Pull the outer edges of all four sections out carefully. You will see two sections on the top that you can pull up, and, on each side, another section laying under, and that’s the one you should pull to the sides. It is always a matter of personal taste how big you want to make your top braid.
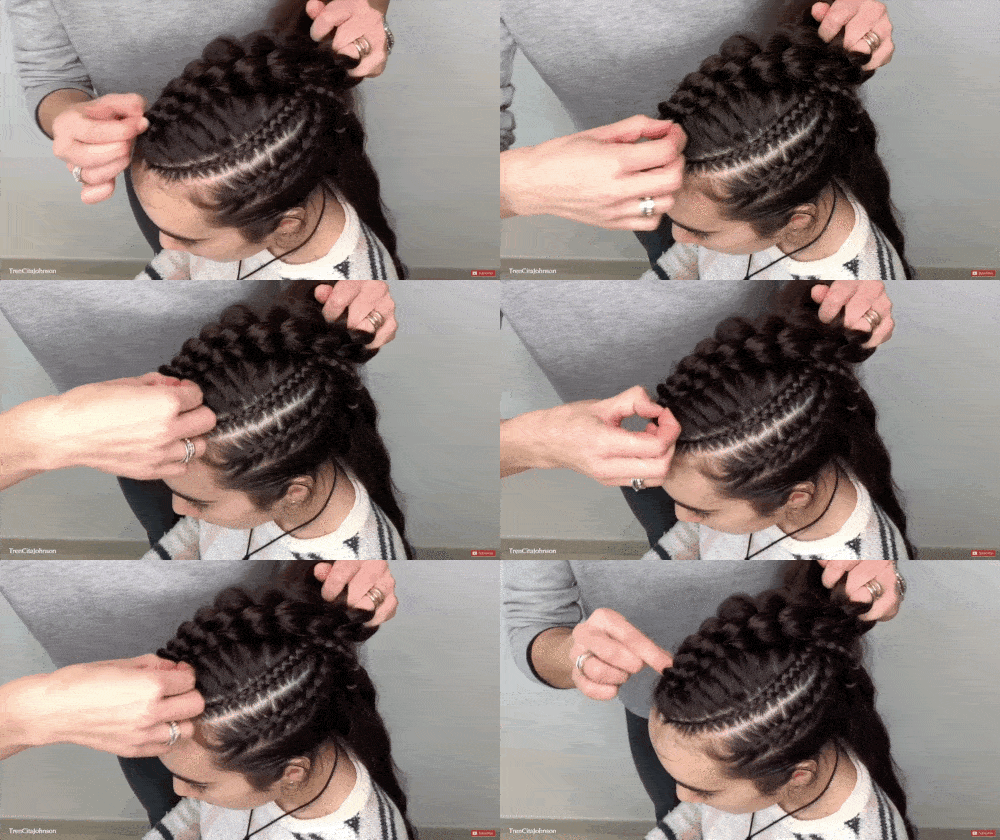
Step 6: Finish The 3D Round Braid
When you are done with the Viking mohawk braid, it is time to braid the remaining hair at the top until the end without adding in any new hair. The technique will still be the same. Before you tie off the braid with a little hair tie, pancake the braid similar to how you did the top section, until you are happy with the result.
Extra tip: I always prefer to hide the elastics by wrapping a little strand of hair around them.
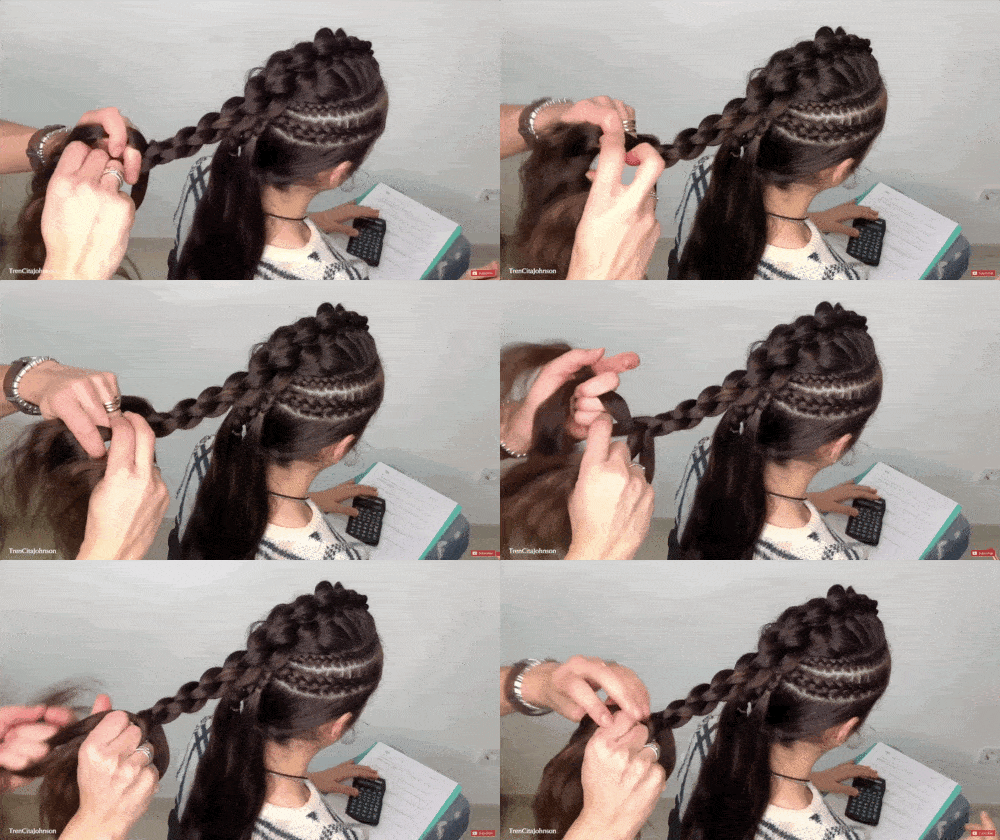
Step 7: You’re Almost There!
Gather together all the remaining hair, including the four side braids and tie them into a ponytail, right under the spot where you stopped adding in hair into the 3D round braid.
Extra tip: Always have your hair ties close to you. I wear the bigger ones around my wrist and the small elastics like a ring on my fingers.
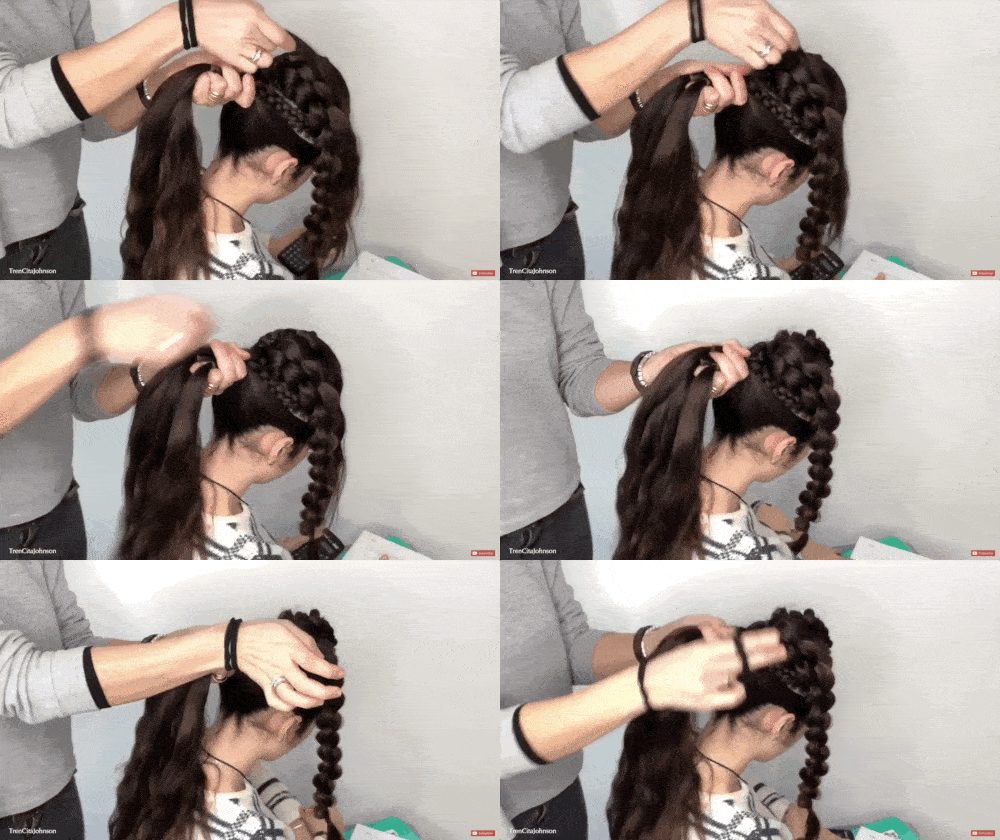
Step 8: Finish!
Take a second, strong hair tie to fix the 3D round braid over the ponytail. Now, use a topsy tail tool to hide it with a strand of hair wrapped around the bobble and you are done!
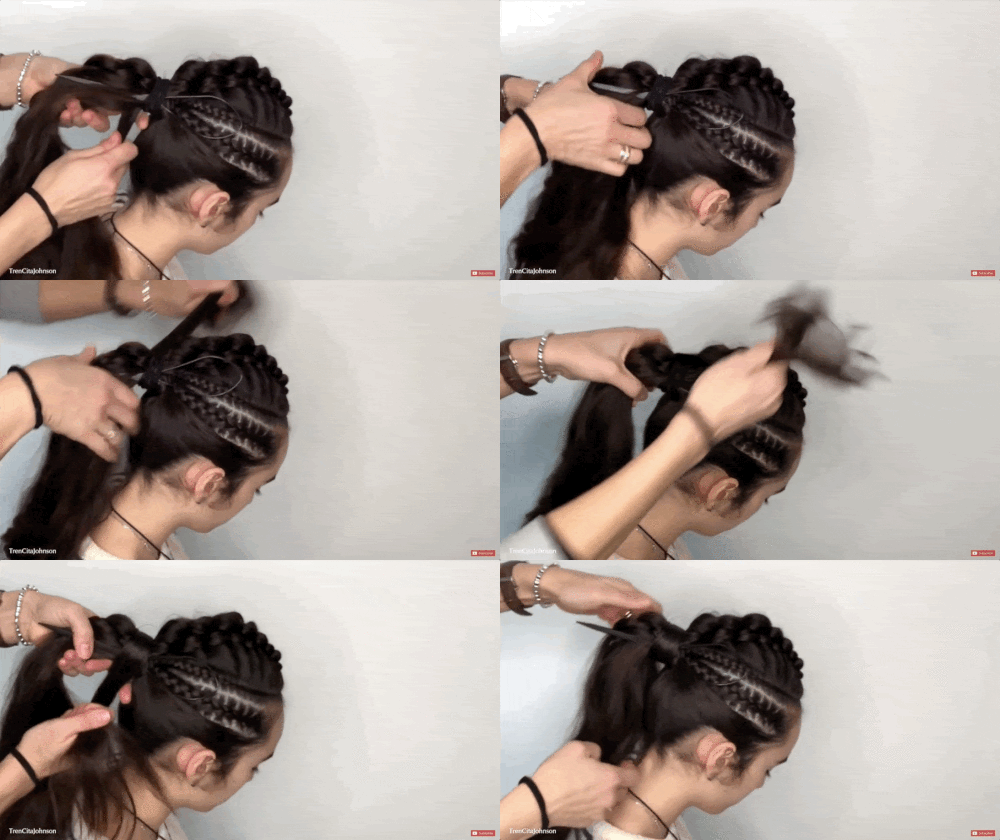
If you need more details to master a Viking braid hairstyle, watch this video tutorial as well:
Did you like this Viking mohawk braid hairstyle made of 3 different braiding techniques? Follow @trencitajohnson on Instagram for more unique and creative hair ideas!
RELATED BEST 10 ON AMAZON:
| IMAGE | TITLE | TRENDS | SEE MORE |
|---|
 | Braids & Buns Ponies & Pigtails: 50 Hairstyles Every Girl Will Love (Hairstyle Books for Girls, Hair Guides for Kids, Hair... | 1844.6 | MORE VIEW |
|---|
 | Goddess Braid Fauxhawks High Puff Braided Hair Pieces for Black Women,KRSI Yaki Straight Braided Mohawks Guin-Gui Jumbo an... | 540.6 | MORE VIEW |
|---|
 | Winkeyes Hair Styling Set, Hair Design Styling Tools Accessories DIY Hair Accessories Hair Modelling Tool Kit Hairdresser ... | 13946 | MORE VIEW |
|---|
 | ELIGHTY Dreadlock Extensions - 24 Inch Synthetic Braids, Soft faux Locs, Dreads, Crochet Locs, Reggae Hair, Dreadlocks Ext... | 741 | MORE VIEW |
|---|
 | Dsoar Dreadlock Extensions Synthetic Dreads Crochet Locs Hair Full Handmade Dreads Extensions 20 inch (30pcs, Blonde) | 5986.8 | MORE VIEW |
|---|
 | 2 Pieces Viking Celtic Hair Clips Hairpin Dragon Hair Sticks Hairpin Triangle Clips Slide Pin Hair Stick Celtic Knot Vikin... | 995.6 | MORE VIEW |
|---|
 | Dread Lock Dreadlocks Braiding Beads Silver Metal Cuffs Hair Accessories Decoration Filigree Tube Silver 8mm 10pcs Pack | 2956 | MORE VIEW |
|---|
 | The New Braiding Handbook: 60 Modern Twists on the Classic Hairstyle | 5317.6 | MORE VIEW |
|---|
 | LolliBeads (TM) 3mm Flat Genuine Leather Strip Cord Braiding String Dark Brown Espresso (5 Yards) | 49131 | MORE VIEW |
|---|
 | AMULISS Professional Mens Hair Clippers Zero Gapped Cordless Hair Trimmer Professional Haircut & Grooming Kit for Men Rech... | 45632.4 | MORE VIEW |
|---|
 | 200 Dreadlocks Beads Hair Braid Rings Clips Dread Locks Hair Braiding Metal Cuffs Decoration/Accessories Jewelry(Silver an... | 16459.8 | MORE VIEW |
|---|
 | Topsy Hair Tail Tools Set,TsMADDTs Hair Braiding Tool Set 8 pcs Topsy Tail Tools 8 pcs French Centipede Braiders for Frenc... | 15531.6 | MORE VIEW |
|---|
 | Winkeyes Hair Styling Set, Hair Design Styling Tools Accessories DIY Hair Accessories Hair Modelling Tool Kit Hairdresser ... | 13946 | MORE VIEW |
|---|
 | Anogol Hair Cap+Princess Wig for Women Braided Brown Cosplay Wig for Girls Maroon Ombre Brown Braids Women's Wigs For Cost... | 7229.2 | MORE VIEW |
|---|
 | Dsoar Dreadlock Extensions Synthetic Dreads Crochet Locs Hair Full Handmade Dreads Extensions 20 inch (30pcs, Blonde) | 5986.8 | MORE VIEW |
|---|
 | Lelinta 18" Wavy Curly Wrap Around Ponytail Extension for Woman Synthetic Hair Extension, 18 Inch-Curly, Medium Brown-curly | 5817 | MORE VIEW |
|---|
 | The New Braiding Handbook: 60 Modern Twists on the Classic Hairstyle | 5317.6 | MORE VIEW |
|---|
 | ICYANG Women Feather Hair Clips, Handmade Boho Hippie Hair Extensions with Clip Comb DIY Accessories Hairpin Headdress, Se... | 5107.5 | MORE VIEW |
|---|
Tips: "Amazon, Amazon Prime, the Amazon logo and Amazon Prime logo are trademarks of Amazon.com, Inc. or its affiliates". AS AN AMAZON ASSOCIATE, WE EARN AFFILIATE COMMISSIONS FROM QUALIFYING PURCHASES.


