Blisters, scabs, and crust are all a good sign; when they occur, it means there is a new layer of skin being formed and the treated area is healing. The reason blisters occur themselves is more of a protective nature. The bubbles the blisters cause are a form of skin protection; the bubbles are preventing germs and bacteria from entering the treated area and causing infection.
How Long Do Blisters Stick Around?
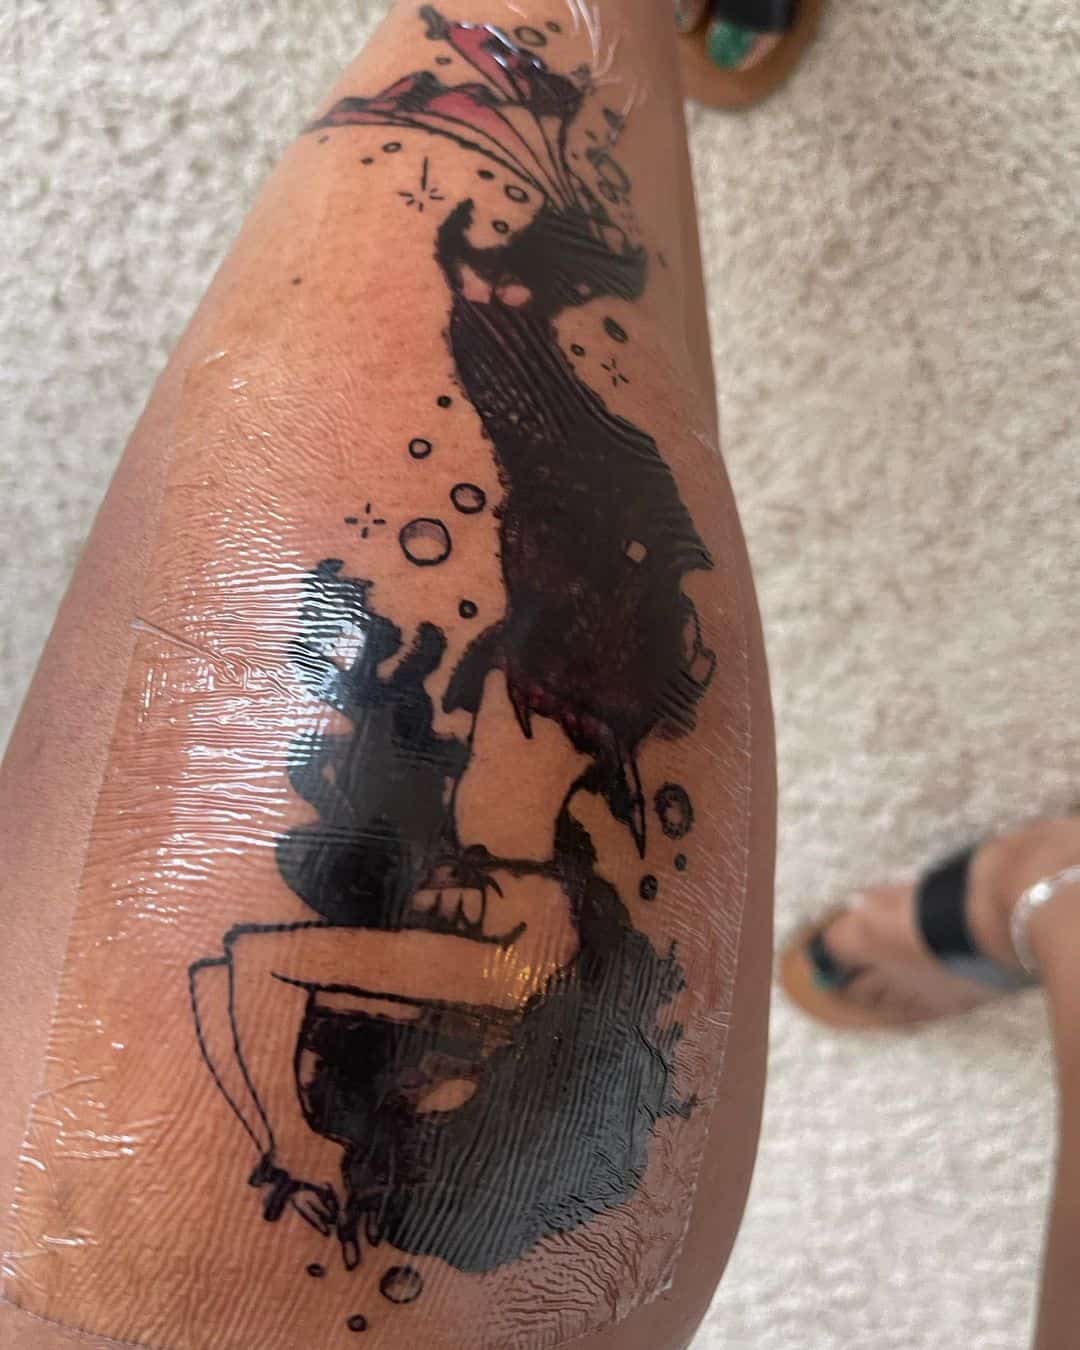
Once the laser removal process is done, in the place where the tattoo once was, blisters will appear. From the moment they appear to the moment they turn into scabs and crusts and fall off, you will have to wait between a few days to a few weeks. To be more precise, the longevity of scabs depends on numerous things;
- The severity of the blisters
- The type of the tattoo that was removed (the color of the ink)
- The placement of the former tattoo
Now, if the tattoo was placed somewhere highly sensitive, where the skin is thinner and there are a lot of nerve endings, the blisters might stick around for a week.
On the other hand, if the removed tattoo was colored and contained pigments like red, yellow, or green, the blisters will be more severe since it will take more time and heat for the laser to diffuse the ink. If the ink was black, the laser removal will be done faster, meaning the blisters won’t be as dramatic and might heal in up to 72 hours.
So, How Do You Treat Blisters Properly?
Upon laser removal procedure completion, you will be provided with information regarding the aftercare. However, sometimes you simply need more insight when it comes to the very treatment and aftercare, so here it goes;
- Keep the treated area clean – we don’t recommend you start cleaning the treated area right away. Just like with new tattoos, you need to let everything calm down and start drying out for the first few hours at least.
Then, you can proceed to wash the area once a day with lukewarm water and antibacterial soap. Make sure to tap dry the area once you’re done, using a paper towel or a clean towel/cloth.
RELATED BEST 10 ON AMAZON:
| IMAGE | TITLE | TRENDS | SEE MORE |
|---|
 | Tattoo Goo Tattoo Balm - The Original Aftercare Salve - 3/4 Ounce Tin (Packaging May Vary) | 18555.6 | MORE VIEW |
|---|
 | 4 weeks tattoo removal cream,Tattoo remover,Permanent tattoo removal,tattoo removalSafe moisturizing skin with black tatto... | 982.1 | MORE VIEW |
|---|
 | Tucks Cooling Pads, Medicated, 100 Count | 213902 | MORE VIEW |
|---|
 | Paulas Choice--SKIN PERFECTING 2% BHA Liquid Salicylic Acid Exfoliant--Facial Exfoliant for Blackheads, Enlarged Pores, Wr... | 329936 | MORE VIEW |
|---|
| 4 Weeks Tattoo Removal Cream, Permanent Removal of Tattoos,Safe Moisturize Skin (2pcs) | 547.4 | MORE VIEW |
|---|
 | SkinSmart Antimicrobial Piercing & Tattoo Aftercare for Rapid Recovery, 8 oz Spray | 685.4 | MORE VIEW |
|---|
 | M3 Naturals Anti Cellulite Massage Oil Infused with Collagen and Stem Cell Help Tighten Tone Stretch Marks Cream Natural S... | 255115 | MORE VIEW |
|---|
 | Dr. Scholl’s Moleskin Plus Padding Roll (24" x 4 5/8") / All-Day Pain Relief and Protection from Shoe Friction with Soft P... | 44141.6 | MORE VIEW |
|---|
 | TruSkin Vitamin C Serum for Face, Anti Aging Serum with Hyaluronic Acid, Vitamin E, Organic Aloe Vera and Jojoba Oil, Hydr... | 493876 | MORE VIEW |
|---|
| Paulas Choice--SKIN PERFECTING 2% BHA Liquid Salicylic Acid Exfoliant--Facial Exfoliant for Blackheads, Enlarged Pores, Wr... | 329936 | MORE VIEW |
|---|
 | Acne Treatment Differin Gel, 30 Day Supply, Retinoid Treatment for Face with 0.1% Adapalene, Gentle Skin Care for Acne Pro... | 284360 | MORE VIEW |
|---|
 | Organic Aloe Vera Gel with Pure Aloe From Freshly Cut Aloe Plant, Not Powder - No Xanthan, So It Absorbs Rapidly With No S... | 278942 | MORE VIEW |
|---|
| M3 Naturals Anti Cellulite Massage Oil Infused with Collagen and Stem Cell Help Tighten Tone Stretch Marks Cream Natural S... | 255115 | MORE VIEW |
|---|
| Tucks Cooling Pads, Medicated, 100 Count | 213902 | MORE VIEW |
|---|
 | Sponsored Ad - Lee Beauty Professional Callus Remover Extra Strength Gel for Feet, at Home Pedicure Results, 8 Oz | 208516 | MORE VIEW |
|---|
 | Hustle Butter Tattoo Aftercare 5oz Tattoo Balm, Heals + Protects New Tattoos and Rejuvenates Older Tattoos - 100% Vegan Ta... | 115051 | MORE VIEW |
|---|
 | Abreva 10 Percent Docosanol Cold Sore Treatment, Treats Your Fever Blister in 2.5 Days - 0.07 oz Tube x 2 | 78451.2 | MORE VIEW |
|---|
 | Glycolic Acid 20% Resurfacing Pads for Face & Body with Vitamins B5, C & E, Green Tea, Calendula, Allantoin - Exfoliates S... | 73735.2 | MORE VIEW |
|---|
Tips: "Amazon, Amazon Prime, the Amazon logo and Amazon Prime logo are trademarks of Amazon.com, Inc. or its affiliates". AS AN AMAZON ASSOCIATE, WE EARN AFFILIATE COMMISSIONS FROM QUALIFYING PURCHASES.